Step
3: Applying the Mask
There are three ways we can apply
the mask in this example. Do one of the following:
Note:
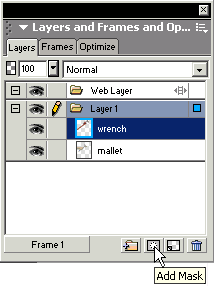
For this example we'll add the mask by clicking the Add
Mask icon. Reveal All
and the Add Mask technique work
the same as they both add a white (transparent) mask to the
object meaning everything is being shown.
This next part relies on you to
frequently switch between tools as well as Stroke colors (black
and white). I strongly recommend you learn the shortcut keys
for these tools as it will allow you to work more efficiently.
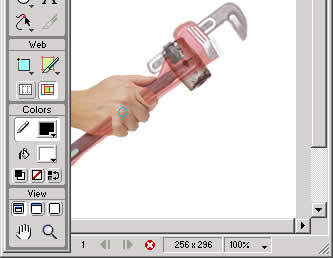
- Lower the opacity of the layer
containing the mask to 50% (or
any value that lets you see both the bottom object and the
top object.) This will help you view the hand and hammer
beneath the mask.
- Click the B
key two times to select the Brush
Tool (B). Clicking B one
time will select the Pencil
Tool (B)
- Click the D
key to set the Stroke/Fill
Colors to their Default settings: Black
for Stroke and White for Fill. You can preview these
settings by looking at the Stroke/Fill colors in the Tools
Panel. We're doing this now because we'll be switching
back and forth between the two stroke colors when we're
drawing on our mask.
- Be sure the mask is selected
by clicking on the mask thumbnail
in the Layers
Panel. The thumbnail will have a yellow border around
it to indicate it's selected.
Step 4: Drawing on the mask to hide
and reveal the object below
We're going to draw over the mask
to Hide the parts of the wrench that would be covered by the
hand. In Fireworks MX black hides and white reveals. That
is the masking mantra. This means we'll draw in black over
the masked object to hide it. When we want parts of the masked
object to be revealed, we'll draw in white.
With the Brush
Tool (B) selected, set the Edge
to Soft Rounded with a low tip size. I prefer the soft
edge most times to better anti-alias the edges of the image.
There are times when a Hard Edge
will work better so just keep that in mind.
The tip size can be increased and
decreased during the process. Most often, I'll often start
with the largest size I can to get the easy areas and then
switch to a much lower setting to draw out the detailed areas.
Begin drawing over the area of the
wrench that covers the hand. Remember, you're drawing with
the Stroke set to Black. As you draw, you'll see the wrench
is being "hidden" while the hand is being revealed.
Use the lowered opacity as a guide for where to draw.
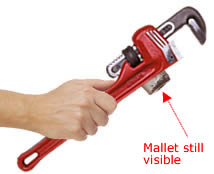
At some point you'll draw too far
over the wrench and the hammer object below will be revealed.
This is just part of the process. Click X
on your keyboard to switch the Stroke
to white and draw over the area to once again reveal the wrench.
You may want to Zoom
in tight on the object to get the more detailed areas. Click
Z to switch to the Zoom
Tool (Z) and click over the area you want to zoom into.
Return to your Brush
Tool (B) by clicking B two
times. At this point you may need to lower your brush size
to get the detailed areas.
Continue drawing over the area while
switching between the black and white colors (using the X
key to toggle back and forth)
|


