 |
|
|
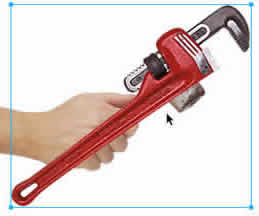
CBT Cafe > Fireworks > Masking Fireworks MX: Using Photo Masking to Replace One Image with Another Image(Lesson from the Fireworks MX: Selections and Masking Techniques Training CD) This is a technique I like to use a lot. There are just so many possibilities with this technique. For example, I once did some design work for a nutritional company where I took their various health products such as herbal drinks, vitamin, and pill bottles and using this same technique in Fireworks, masked the products into a new image where people were at parties holding beer bottles, cans, and other adult beverages. The premise was the company's health products could make you just as euphoric as your adult beverages. Anyway, the masking effect came out well and this lesson is an introduction to the technique. Step 1: Getting StartedIn this example, I am starting with an image of a person holding a hammer and then I will replace the hammer with this wrench. I first removed the white background from the wrench. To view a tutorial on removing the white background, click here.
Step 2: Setting up the Objects
|
|
||||||||||
| Home | Dreamweaver | Fireworks | Flash | Photoshop | Elements | PowerPoint| Ebay | QuickTime Pro | Flash 5 CD | Fireworks MX CD | QuickTime Support | Contact Copyright © 1999-2015 CBT Cafe, All rights
reserved CBT Cafe | Multimedia Learning | Interactive Graphics
|