 |
|
|
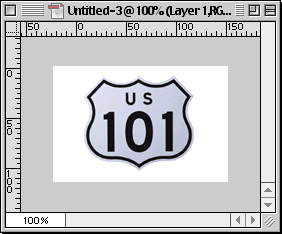
CBT Cafe > Photoshop > Brushes & Shapes Photoshop: Creating A Custom Brush From An ImageStep 1: Getting StartedOpen an image or graphic Note: whatever size your image is when you make it a brush will be the size of the brush. For example, if you take an image 30x30, your custom brush will be that size. If you need more than one size for your new brush, you'll have to repeat the steps to create a new brush for each size you desire. Here's the image I opened, then scaled down using the Image>Image Size...
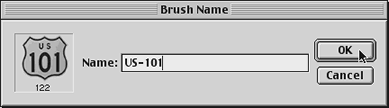
Step 2: Defining the Image as a Brush
Step 3: Appling your Custom Brush
|
|
||||||||||
| Home | Dreamweaver | Fireworks | Flash | Photoshop | Elements | PowerPoint| Ebay | QuickTime Pro | Flash 5 CD | Fireworks MX CD | QuickTime Support | Contact Copyright © 1999-2015 CBT Cafe, All rights
reserved CBT Cafe | Multimedia Learning | Interactive Graphics
|