 |
|
|
CBT Cafe > Fireworks > Menus, Buttons & Animations
|
|||||||||||||
 |
Step 2: Creating the Animation
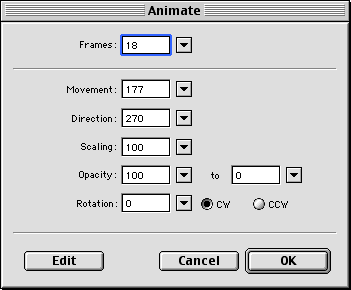
- Go up to Modify>Animate>Animate Selection.
- This brings up the Animate dialog window. I want my text to fade to 0% Opacity and to fade from the top to the bottom.
- These are the settings I used. Click OK to continue.
 |
Step 3: Creating the Frames
- Fireworks will pop up an alert window telling you that the animation extends beyond the current frames of your document.
- Click OK to have Fireworks add the necessary frames for your animation.
- You can also disable this from popping up again by clicking the checkbox in the bottom left hand corner.
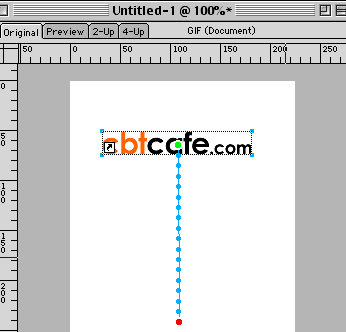
Step 4: Modifying the Animation
This let's you view the selection handles for the animation. The green circle is the starting point of the animation and the red circle is the final point.
You can move either of the points to adjust the direction of the animation. If you wanted to make the text travel farther, for example, you could drag the red circle farther down towards the bottom of the document.
 |
Step 5: Testing the Animation
- You can test your animation by clicking the Play button at the bottom of your document.
- Click Stop to stop the animation when you're satisfied with how it looks.
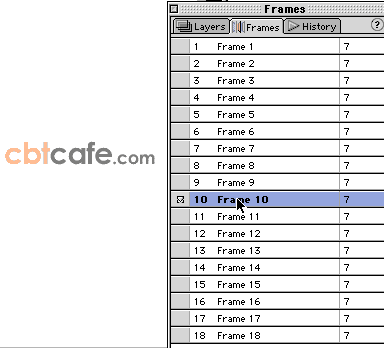
Step 6: View selected frames in the Frames Panel
- Take a look at the Frames Panel (Window>Frames) and notice how Fireworks created the 18 frames for you.
- Click on any of the frames to view that part of the animation.
 |
| Page 1 | Page 2 |
|
|
| Home | Dreamweaver | Fireworks | Flash | Photoshop | Elements | PowerPoint| Ebay | QuickTime Pro | Flash 5 CD | Fireworks MX CD | QuickTime Support | Contact Copyright © 1999-2015 CBT Cafe, All rights
reserved CBT Cafe | Multimedia Learning | Interactive Graphics
|