Fireworks
MX: Perspective Shadow Effect
This is a great Fireworks special effect for creating
realistic perspective shadows. It gives a "depth of field"
effect to your images.
Step
1: Getting Started
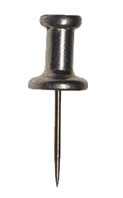
Open a new image that you'd like
to apply the perspective effect to. In this example I'm using
this Push Pin image.
First off, you'll need to remove
the background color from the image. If you need assistance
with that technique and would like to view a tutorial on removing
backgrounds.
Step
2: Duplicating the Object
To duplicate
the pushpin, do one of the following:
As you can see there are several
ways to create a duplicate object. I prefer to click and drag
the layer down to the New/Duplicate
Layer icon because it will not only duplicate the object
but duplicate the layer as well.
Lock the top layer to prevent it
from being selected. We're going to create the shadow effect
on the bottom object.
Step
3: Creating the Perspective
Effect
- Click on the pushpin to
select it. If you locked the top layer you'll automatically
select it.
- Turn off the visibility of the
top layer so you can see your changes to the bottom object.
- With the object selected, click
on the Effects pop-up menu
in the Property Inspector
and select Adjust
Color>Levels...
- Set the Maximum
Intensity value to zero (0)
- Right click on the object and
select Transform>Distort
(Alternatively you can go up to Modify>Transform>Distort
but I find right clicking to be more efficient)
- Click the top-middle selection
handle and drag down and to the right or left to create
the effect
Step
4: Creating the Shadow Effect
This next part takes advantage of
the new way in which Fireworks MX lets you create gradient
masks.
- Add a Bitmap
Layer mask
- Select the Gradient
Tool (G)
- In the Property Inspector make
sure Fill
Selection is selected and for Mask To, select Grayscale
- Click and drag from the right
of the pin to the left. This is how the perspective shadow
is applied. Don't worry if you didn't get the effect you
like. You can continue clicking and dragging over the bottom
object until you get the right fading effect.
If you get this
effect, it means you applied the gradient to the image
rather than to the mask. Click Control-Z
or Command-Z to undo your last step, click the mask
thumbnail and reapply the gradient. You'll know the mask is
selected because it will have a yellow
border around the thumbnail. When the image is selected
it the thumbnail will have a blue border
around it. You can see the blue border around the image in
the popup window.
Optional:
You can apply a Gaussian
Blur to the bottom object before you apply the the gradient
mask to it. Depending on your object this may add more realism
to your effect. As with all tutorials, try and experiment
with the basics provided in the lesson to get your own custom
effects.
|