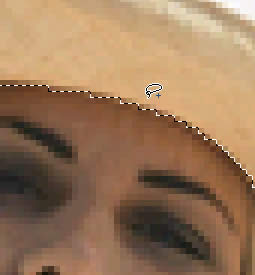
Remember
to select Anti-Alias for the
Edge and try to separate the
pixels between what you're selecting and excluding. The Anti-Alias
edge will keep the separation softer.
Step 4: Saving Your Selection
Once you're satisfied with your
selection, it's a good idea to save it. This is very helpful
for this type of selection since it's taken a fair amount
of time to create.
With the selection still active,
do one of the following:
This means that as long as you save
your current document and close out of Fireworks the selection
is saved with it. The next time you open the file, you can
double click on the image and then right click in the canvas
and select Restore Selection
and the selection will be restored and active.
This is especially helpful when
you're first creating selections as you won't always know
how good or bad of a selection you created until you modify
it. In the next step, we're going to copy the selection and
modify it. If the selection we copy and modify isn't the best
selection, we can delete it and restore the selection for
further modifying.
Step
5: Copying and Modifying the
Selection
With the selection still active:
- Click Control-C
or Command-C to copy the selection
- Click the Escape
Key to deselect the selection. Optionally, you can
click Control-D or Command-D
to deselect or click the Exit
Bitmap Mode button to exit and deselect
- Create a New
Layer and Paste the copied
selection on that layer.
- Lock
the bottom layer temporarily to prevent it from getting
selected.
- Turn off the bottom layer's visibility
This looks like a good selection
but we will have a better idea of just how good it is after
we colorize it and toggle its visibility with the bottom layer
visible.
Step
6: Adjusting the Copied Hat's
Color
- With the hat selected, click
on the Effects drop-down menu
in the Property Inspector and select Adjust
Color>Hue Saturation...
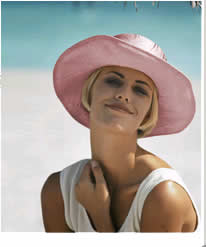
- In the pop-up window, select
the Colorize
button and adjust the sliders to colorize the hat. In this
example I'm changing the color to red.
- Turn the visibility back on for
the bottom layer
- Toggle the visibility of the
2nd layer on and off to view the colorized hat over the
bottom hat
At this point, if your selection
is the way you like it, you're ready for the final step.
It's possible, however, you didn't
quite make the perfect selection the first time and will need
to return to your selection and make further edits. To restore
and modify your original selection:
- Delete
Layer 2 with the colored hat since we're going to create
a new one.
- Unlock
Layer 1 and double-click the image
- Right click and select Restore
Selection from the drop down menu
- Make the necessary modifications
to your selection by adding and subtracting from the selection
as you did earlier
- Save your selection again to
keep your latest changes as you did in Step
4
- Continue from Step
5 to copy and paste your new selection
|