|
 |
 |
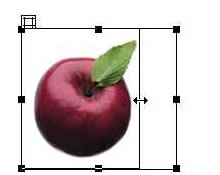
Step 6: Resizing the Layer
- Scale
the layer to fit perfectly around the apple image.
- Move
your cursor over the edges of the layer until you see the cursor
change into a "hand". Once you see the "hand cursor",
click once to select the layer. Once you've selected the layer,
you'll notice the black selection handles. Move your cursor over
the black selection handle until the cursor changes into a double-sided
arrow.
- Grab
the middle one on the right side and drag inward. This will scale
the layer to the width of the image.
- Do the
same thing for the bottom resize handle, dragging towards the
center of the image.
 You
can also resize the layer to the size of the image numerically.
Click once on the image and then go up to the Properties
Inspector and in the image properties, note the width/height
and input the values in the W and H fields (Width and Height). You
can also resize the layer to the size of the image numerically.
Click once on the image and then go up to the Properties
Inspector and in the image properties, note the width/height
and input the values in the W and H fields (Width and Height).
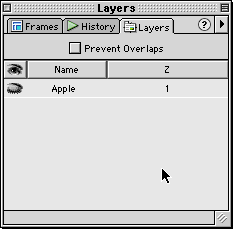
Step 7: Turning Off the
Apple Layer's Visibility
- In the
Layers Palette, click in the Eye-Icon Column for the Apple Layer..
- To hide
the layer, click until you see the eye closed.
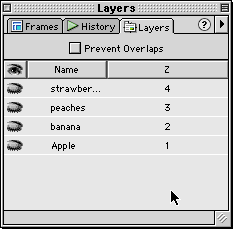
That's basically it. Repeat steps 5-11
for your remaining images. Once you've completed that, go on to
the next step for next part of the lesson:)
Here's what my document/layers palette
looks like with all four layers:
|
  |
|