 |
|
|
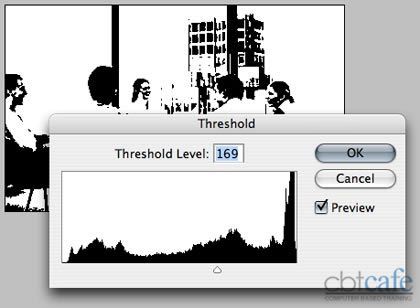
Photoshop CS3: Threshold & Blend Mode DesignVersion: Photoshop CS3 Photoshop's Threshold command converts colors to either black or white. Blending Modes offer endless opportunities for creating special effects in Photoshop. In this tutorial we'll take a look at combining the Threshold command to create a high-contrast, black-and-white image with blending to highlight specific colors in our image.
We'll experiment with several blending modes but in the end you'll want to determine which effect is right for your image. Step 1: Getting Started - ThresholdGo ahead and select an image to work with in Photoshop.
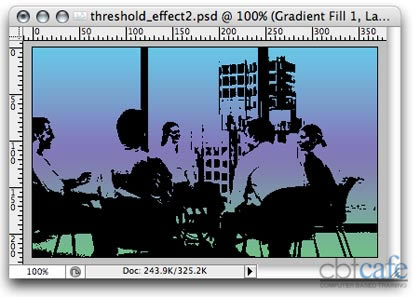
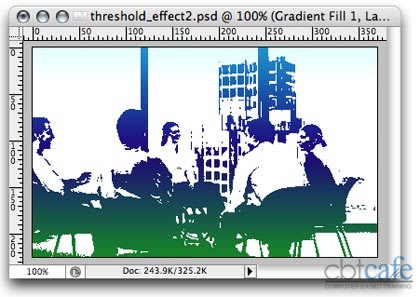
Step 2: Applying a Gradient FillWe just stripped out the color by applying the Threshold command. Now, let's bring it back in the form of a Gradient fill Adjustment Layer.
Step 3: Selecting a Blending ModeThe next step brings this all togwether. There are multiple blending options that will work with this effect. As always be sure to experiment.
Blending Mode: Pin Light
Blending Mode: Multiply
Blending Mode: Pin Light
|
|
||||||


| Home | Dreamweaver | Fireworks | Flash | Photoshop | Elements | PowerPoint| Ebay | QuickTime Pro | Flash 5 CD | Fireworks MX CD | QuickTime Support | Contact Copyright © 1999-2015 CBT Cafe, All rights
reserved CBT Cafe | Multimedia Learning | Interactive Graphics
|