Photoshop Elements: Inverse Selections &
Removing an Object from the Background
Version: 2.0
Level: Easy
Objectives: Learn how to take
an active selection and invert it to create a quick selection
around what would normally be a more difficult selection.
Tools & Techniques:Selections,
Magic Wand Tool, Selecting Background, Removing an Object
from the Background, Inverse Selections
One of the more common techniques when working with digital
images is to remove an object from the background and place
it over a new background. Depending on your subject, this can
be an easy task or a more challenging one.
In this example we'll take a look at removing an image from
its background using the Magic Wand
Tool and creating Inverse
Selections.
Step 1: Getting Started
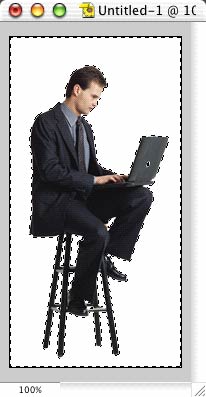
We're starting with an image of a man and a laptop on a white
background. We want to create a selection around the man but
that would require a good amount of work. Instead, we can create
a selection around the area we do not want: the background.
- Select the Magic
Wand Tool
- Set the Tolerance to
a lower number, I used 5 in this example
- Select Anti-Alias
- Deselect the Contiguous option if it is currently selected
- Click once in the white area to select all solid white
areas of the image
Step 2: Selecting the Inverse
Now the background is selected, we just need to "reverse"
the selection to select everything but the background.
- Go to Select > Inverse to
reverse the current selection
- Next, go to Edit > Copy to copy the selected subject
- Open a new image you'd like to place the subject over
- Go to Edit > Paste to paste the subject over your new image
Your final image:
|