Flash MX: Using
the ScrollPane Component
Version: Flash
MX
Level: Easy
Preview
final movie
This lesson will introduce you to
incorporating the Flash MX ScrollPane component into your
movies for the purpose of scrolling thumbnails to load external
.swf movies.
Step 1:
Getting Started
We started by creating a new Flash
movie and then creating 8 graphic symbols that will be used
as our thumbnails. We also created larger .swf movies for
each thumbnail that we'll later load into the main movie.
While this isn't necessary for demonstrating
how to create and use the ScrollPane, we thought it would
be of greater benefit to demonstrate the technique in a complete
project. We have a tutorial on Loading
Movies available here.
- Select all the graphics and/or
buttons you want to scroll and convert them to a Movie
Clip by clicking F8
and selecting Movie Clip.
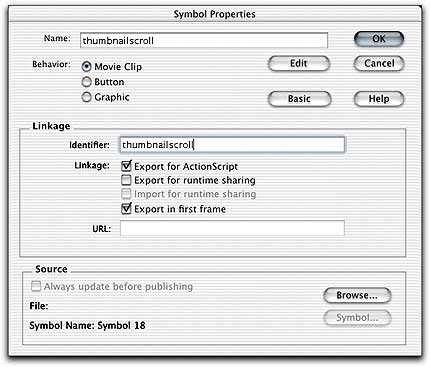
- In the Name
field, give your Movie Clip
a name. If your Symbol window
isn't already expanded, click the Advanced
button to expand it
- Select "Export
for ActionScript" under the Linkage
section. You'll notice your Movie Clip's name is automatically
inserted into the "Identifier"
field.
Step 2:
Adding the ScrollPane Component
If your Movie
Clip is on your stage go a head and select it and delete
it. We don't need it on the stage anymore. We only need to
have it in the Library so don't delete it from the Library.
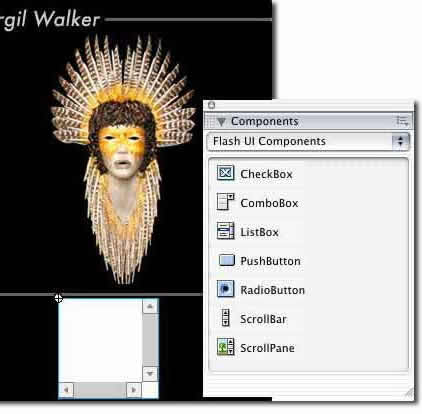
- Open your Components
panel by going to Window>Components
- Drag the ScrollPane
Component to your stage
- Position your ScrollPane
where you want it in your movie
Step 3:
Customizing the ScrollPane
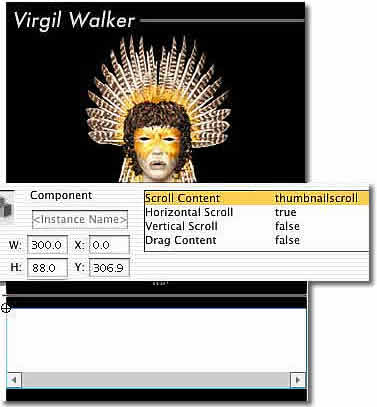
Now I want to make the ScrollPane
fit in my movie and set a couple of parameters for which way
I want it to scroll.
- For Scroll
Content, enter the exact name you named your Movie
Clip. In my example, that would be "thumbnailscroll".
- Next, click on Horizontal
Scroll and set it to "true"
- Set Vertical
Scroll to "false"
- Leave Drag
Content to "false"
Note:
If you are loading your movie clip images or text dynamically,
you would most likely leave the Horizontal and Vertical Scroll
fields set to "auto" since this option will only
add the scroll bars if the content is greater than the ScrollPane.
Resize the ScrollPane by either
entering the numeric values in the Properties Inspector for
both the Height and Width or simply click Q (Free Transform
Tool) and click and drag the ScrollPane to resize it.
You can see my custom settings
in the image above. My Movie Clip is 60 pixels high (the size
of my thumbnails) so I added an additional 28 pixels to that
for the ScrollPane's height.
I matched the width of my ScrollPane
to the width of my movie: 300 pixels. Go ahead and preview
your movie by clicking F12.
Final Notes:
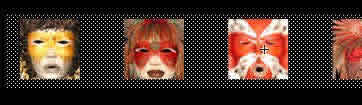
You may find yourself needing to
tweak your Movie Clip a bit. For example, if you notice in
my source .fla, I placed a black shape on a layer below my
thumbnails. This is because by default the ScrollPane has
a white background.
I also extended the black shape
a little past each end of the the thumbnails to better position
the thumbnail movie once it's loaded into the ScrollPane.
If I had kept the black shape flush
left with the first thumbnail, the thumbnail movie would be
loaded with the first thumbnail flush against the ScrollPane.
I just prefer there to be a bit of a margin on either side
of the thumbnails.
|